Multi-factor authentication (MFA)
LeapAP prides itself on maintaining high security standards. Consistent with this, we have available multi-factor authentication (MFA), which adds an extra layer of safety.
Important: This is required for all Client Admin users.
For all other users, MFA is optional but highly recommended. Any users who aren’t required to login to use LeapAP, such as vendors who submit invoices through email, will not need to enrol.
How to set up MFA:
- To get started, please download the Google Authenticator app (Google Play Store or App Store)
- Open the app once it is downloaded, tap the “Add” button
- Go to your user profile in LeapAP in the top right corner and click “My Profile”
- Beside “Multi-factor Authentication”, click “Enable/Re-enable”
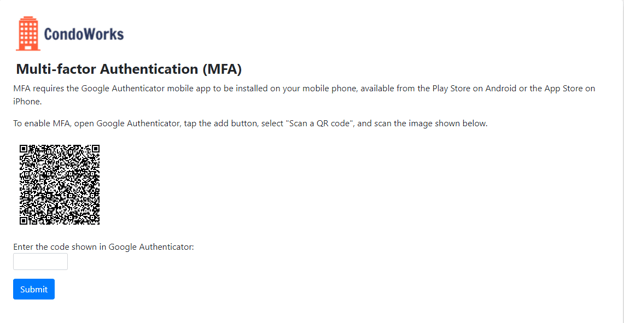
- On the Google Authenticator app, select “Scan a QR Code” and scan the QR code shown in LeapAP
- In LeapAP, enter the code shown in Google Authenticator and hit “Submit”
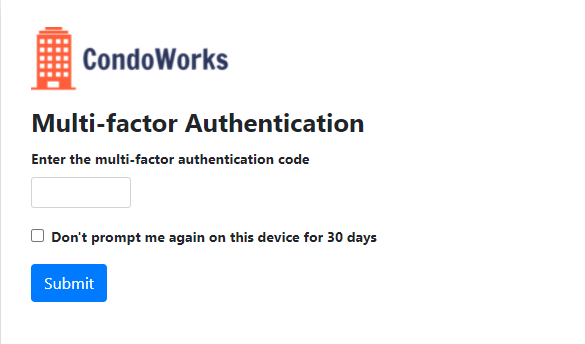
Once set up, you will be prompted to enter the code shown in Google Authenticator when logging into LeapAP (you will be able to skip this step for 30 days on trusted devices)


Who needs to use MFA:
Effective November 4, 2021, all users who are Client Admins will be required to enroll in MFA. For all other users, MFA is optional but highly recommended. Any users who aren’t required to login to use LeapAP, such as vendors who submit invoices through email, will not need to enroll.
For extra help with the Google Authenticator app, please refer to their help centre.
New phone or reset yours? Please use the recovery code provided to you while setting up the MFA initially. You can use the recovery code to reset the MFA and set it up on a new device or reset it on a current device as well.
%20(1).png?width=200&height=52&name=LeapAP(finalfiles)%20(1).png)