LeapAP already automatically extracts invoice number, date, and amount from all invoices, but you can also auto-code invoices and set their descriptions automatically to make processing invoices even faster! When a vendor at a property is configured for auto-coding and auto-description invoices, any new invoices received from that vendor will be ready for approval. You can always change the invoice description and expense GL during the coding and/or approval process if necessary.
To configure auto-coding and/or auto-description:
- Click on Vendors in the top navigation bar
- Select All in the drop-down menu
- Search for the relevant vendor and property
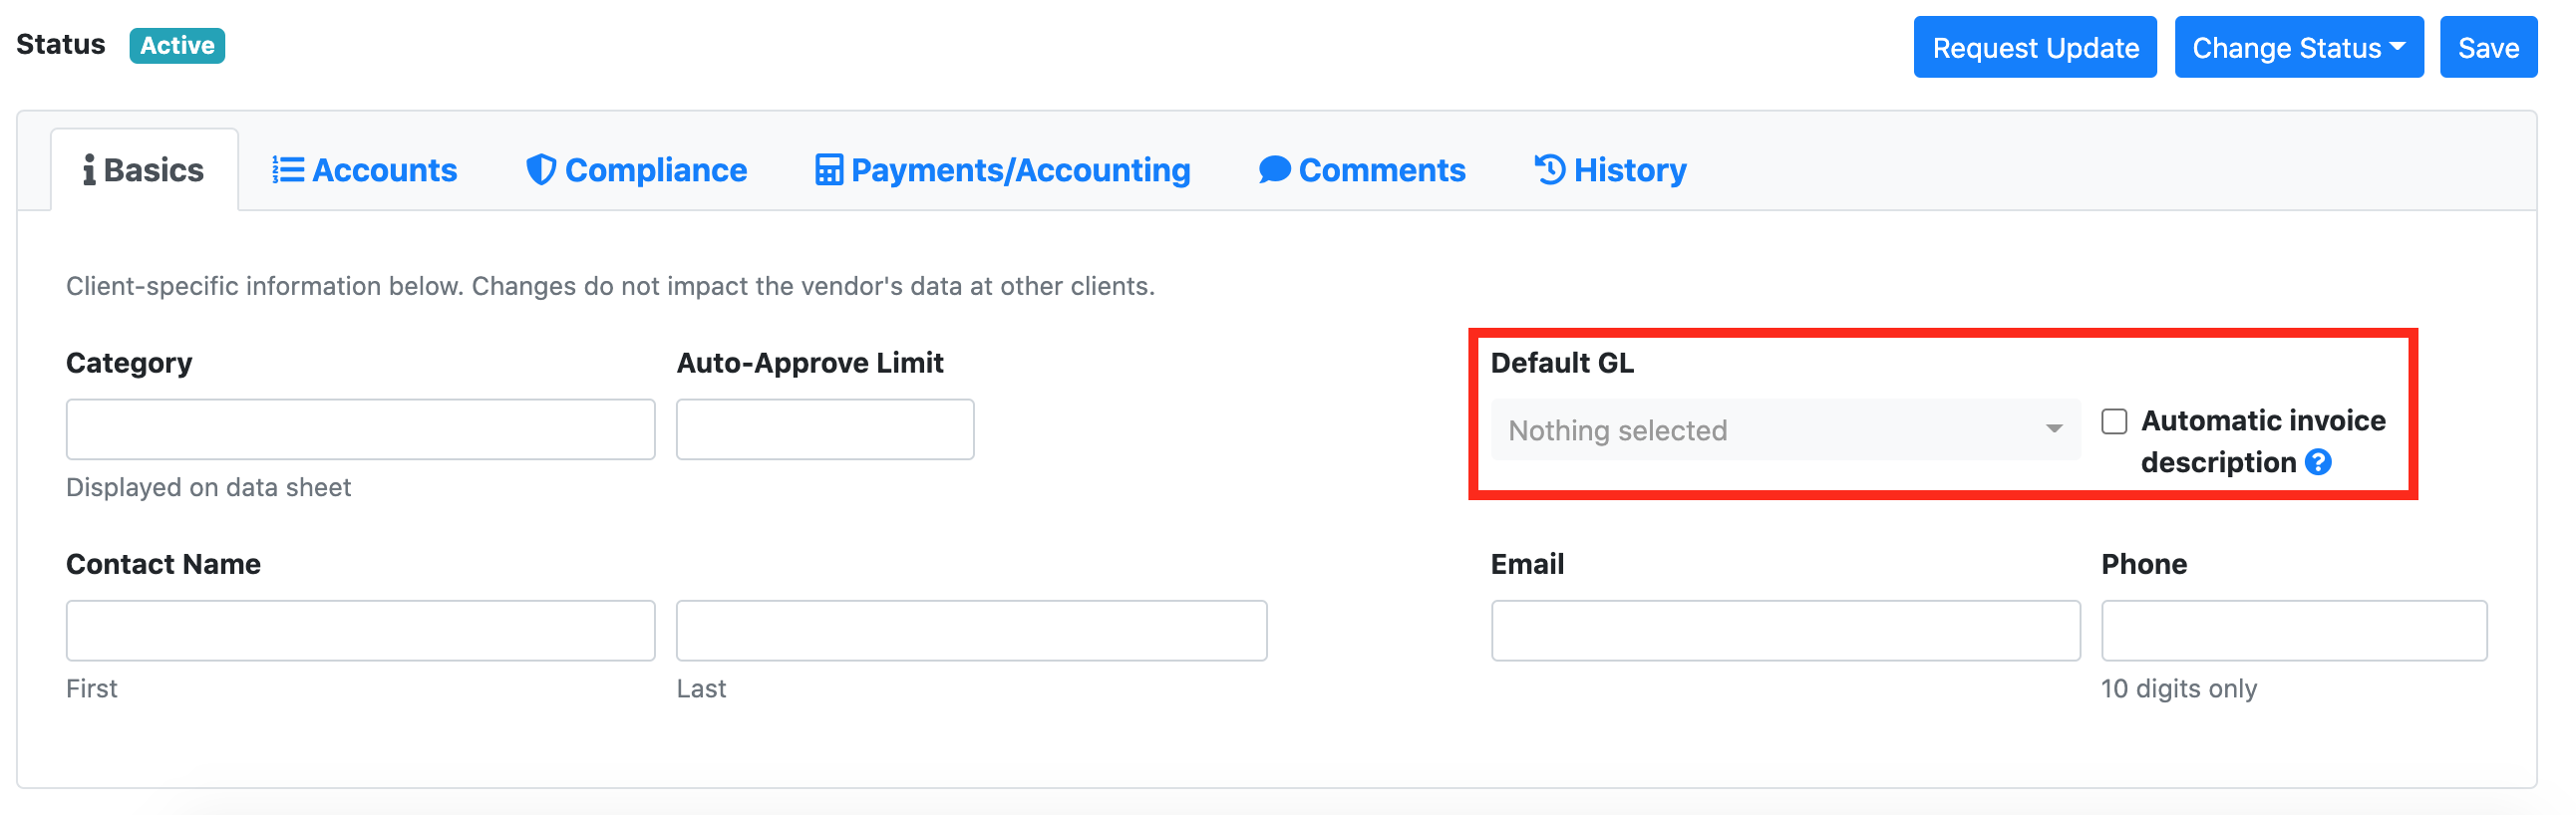
- Select the Basics tab at the bottom of the screen
- Choose a Default GL in the searchable drop-down box to select the appropriate expense GL
- Check the Automatic invoice description box if you also want to auto-populate the Invoice Description
- Click Save
Note: This Default GL will apply to all the accounts that are listed in the accounts tab.
LeapAP also allows you to set up account-level Default GLs. To do so, follow the steps below:
- Click on Vendors in the top navigation bar
- Select All in the drop-down menu
- Search for the relevant vendor and property
- Select the Accounts tab at the bottom of the screen
- Choose a Default GL by clicking on the Change Default GL button for the account numbers listed on that page and then selecting the GL from the dropdown menu.
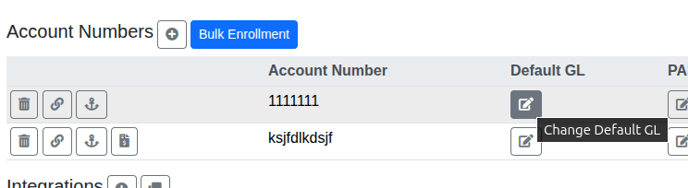
- Click Save
Note: If the account-level GL is not selected (left blank), the GL that is set on the 'Basics' tab will be applied to the account number.
When automatic invoice description is enabled, utility invoices will have the Invoice Description set to the usage period and account number or the invoice year/month and account number. Non-utility invoices Invoice Description will be set to invoice year/month.